Dr. Glass Professional Repair Use Instructions
- Repair quality is determined by the time from damage occurrence to repair due to dirt
deposit, which will results in certain level of flaws in the appearance and strength,
reducing the Repair's function.
-
- Picture of actual bonded glass crack:
| Asteroid Shape Crack |
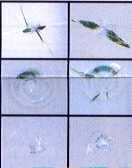 |
Carry out Step I to 6. |
| Round Shape Crack |
Carry out Step I to 6. |
| Surface Crack |
Carry out Step I to 6. |
|
 |
When natural lighting is not available, use Dr. UV light after
repair.
|
When repair is carried out in rainy days, the drying time
should be longer.
|
|
STEPS:
1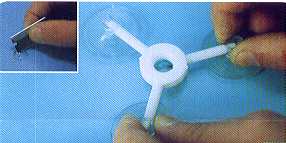
- Clean surface crack.
- Assemble the stand, and align with crack centre.
|
2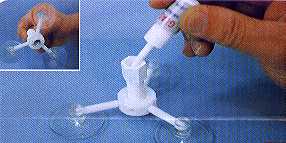
- Gently screw the pressure vessel onto the stand to contact with crack.
- Apply about 6 drops of Repair into the pressure vessel.
|
3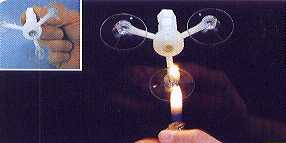
- Slowly screw piessure rod into pressure vessel until rubber is fully expanded.
- Let sit for 2 minutes or longer; use vehicle lighter to burn crack for about 15 seconds.
|
4
- Remove pressure rod quickly to drive out the air bubbles. If air bubbles still remain in
crack, repeat Step 3 and 4 to remove air bubbles until the crack area is completely
transparent.
|
5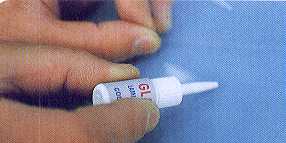
- Remove the stand; apply Repair to crack.
- Cover crack with Dr. Glass Adhesive Sheet; do not press down with hand.
|
6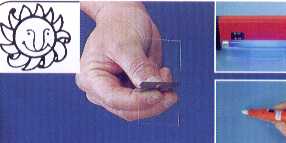
- Let expose to natural light outdoor for about 10 minutes, or use Dr. Glass UV Light.
- Remove the adhesive sheet, and scrape off the excessive Repair already
hardened on glass with blade at 90 degree angle.
- Use Dr. Glass Polish to polish the crack in completing the repair.
|
|